The Boat Shed
The sheds framework is massive, using 12 inch x 12 inch columns and beams that I milled from my neighbors yellow pine trees. The framework was designed to be able to lift the boat using four separate five ton manual chain hoists and nylon webbing. The hoists were bought over the internet from ACI Hoist and Chain for about $300.00 each. This was considerably cheaper than any other vendor. The nylon slings were purchased from Rigging Products, Inc., also the best price I could find on slings. After receiving the hoist, I did notice that they were all dented on the casing but it in no way hindered their operation. I would have liked the vender to have disclosed this info prior to purchase, however.
picture: hoist and sling slung around boat10/25/07 The boat shed has massive frames capable of lifting the boat and has a 16 ft. high clearance and is 16 ft. wide and 32 ft. long. I was lucky to have a large barn to bolt the shed to.The beams were hoisted in place using a 22ft. long log vertically strapped to 3 stacks of scaffolding with a truck winch and heavy duty pulleys as power. The boat hoist will cost less than $1500.00 and the shed around $3500.00, which includes a 32 ft x 16 ft. concrete pad and metal roof.
.jpg)
.jpg)
My shed and shop after two days without a cleanup. Whew! My shop is on the top floor just to the right of my shed. I have a plank running from it to the deck of my boat.
Boat Stands Too Short!
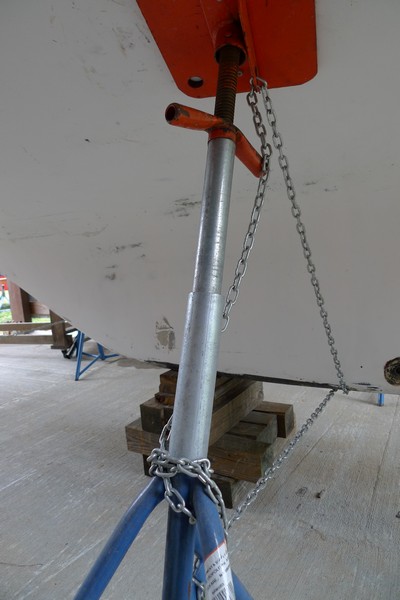
10/07 The first obstacle was to overcome the wrong sized sailboat stands (too short). I cut 12 inch lengths of similar diameter pipe as the sailboat stand pipe and extended the stands using a larger diameter pipe as a collar to hold the extension pipe in place. I then placed the screw pads into the extensions and used two 3/16 inch chain to hold both the stand pads and stand bases together. This seems to work well.
Remove Parts and Paint
I didn't have a clear idea of to what extent I was going to restore this Hallberg Rassy. It took some time to really look over the boat and decide what was worth keeping and what wasn't. The degree of restoration was also going to depend on the level of restoration I wanted and the money I wanted to invest. These decisions didn't happen overnight. The restoration "evolved" and became more involved as it progressed. I would think, heck if I went to all the trouble to get this looking good, I might as well do this too. And so it went, becoming more extensive every week.
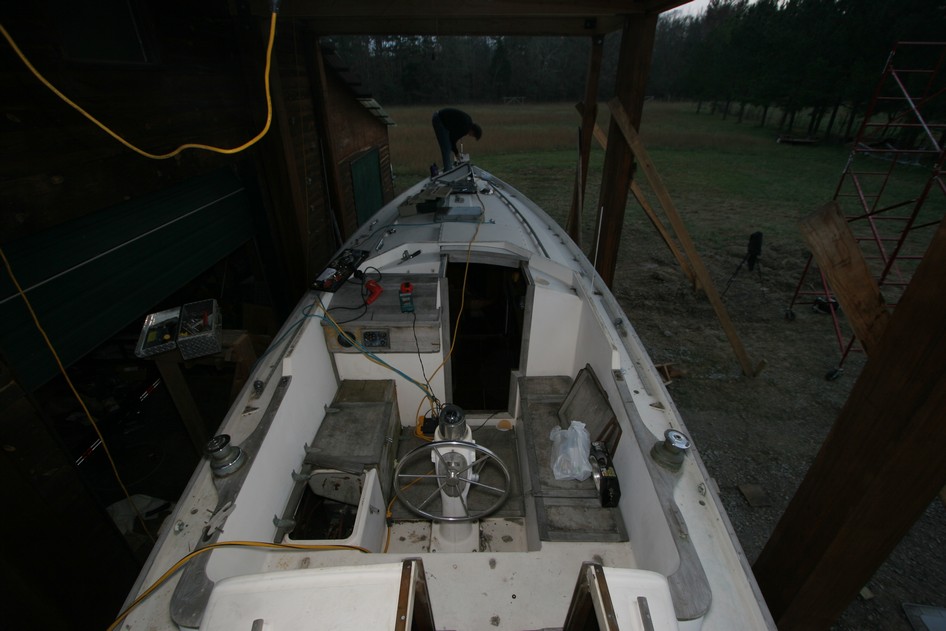
I have just started removing parts and don't have a clue to the extent of this restoration at this point. The degree of restoration will "evolve" as we go.
10/11/07 My bud Darryl (who is a fantastic photographer) offered to photo document the vessel and help work on it for beer. In particular, Guiness Stout. We photo documented the boat for future reference in case we forgot where parts went and also labeled them as we dismantled the boat. Initial work included: removing teak toe rail, removing stanchions and bases, removing teak anchor base, removing rotted teak in cockpit area, removing stainless steel fish box in cockpit, and removing aluminum wind shield. The teak toe rail took 2-3 hours to come off. I used a drill bit to remove the wooden bung and then removed the rest of the bung with a straight slotted screw driver bit attached to a battery operated drill, using the drill to roto clean the bung hole. Stanchions and bases took about 4 hours to come off and was much faster with two people, one on deck and one below. One could do it alone using a small vise grip to hold the nut below while backing the screw out on deck.
 (Small).JPG)
All screws, bolts, and small hardware were bagged and labelled for later refernce.
The Art of Stripping
The first big job is removing the bottom paint. After wasting a bit of money on different grits of sandpaper (36-80 grit) and using both orbital and conventional sanders and blowing toxic dust all over everything, I decided to try the chemical stripper route and so far that seems to be the less abusive but very slow. Sanding is finicky and a worker can easily cut through the gel coat. A coarser grit sandpaper is faster but the chances of gel coat damage increases. A finer grit sandpaper is just plain slow but more important to me, much too dusty. A chemical stripper also would seem to be easier when it comes to multiple start ups. The preparation and clean up would seem to go much smoother than with sanding.
12/15/07 Well after trying both sanding and chemical stripper I have concluded rotary sanding is potentially damaging and very dusty and the chemical stripper is very slow and smelly. We have since tried scraping with a high quality carbide paint scraper with a long handle. This is hard physical work, but it gets the paint off with minimal dust or smell. You can get 3 or 4 helpers on the boat without covering each other with a cloud of dust or obnoxious fumes. Scraping will be our predominant method of bottom paint removal. We are taking a minimum of 4 coats of bottom paint off. I ground off the sharp points on both sides of the scraper blades to keep those edges from gouging the gell coat That seems to help.